Configure VMware Horizon View client device certificate authentication
Adding a second factor to your authentication is always a good idea. Typically the second factor is a One-Time Password (OTP) or a push notification. But what if you want to allow the login into your Horizon View environment only from specific devices? This implies that you need some kind of second factore that also identifies the device. At this point the arch enemy of many of us comes into play: Certificates!
To be honest: It is not so hard to get client device certificate authentication to work. All you need is:
- Unified Access Gateway 2.6 or later
- Horizon 7 version 7.5 or later
- A certificate installed on the client device that Unified Access Gateway accepts
Configure X.509 authentication settings
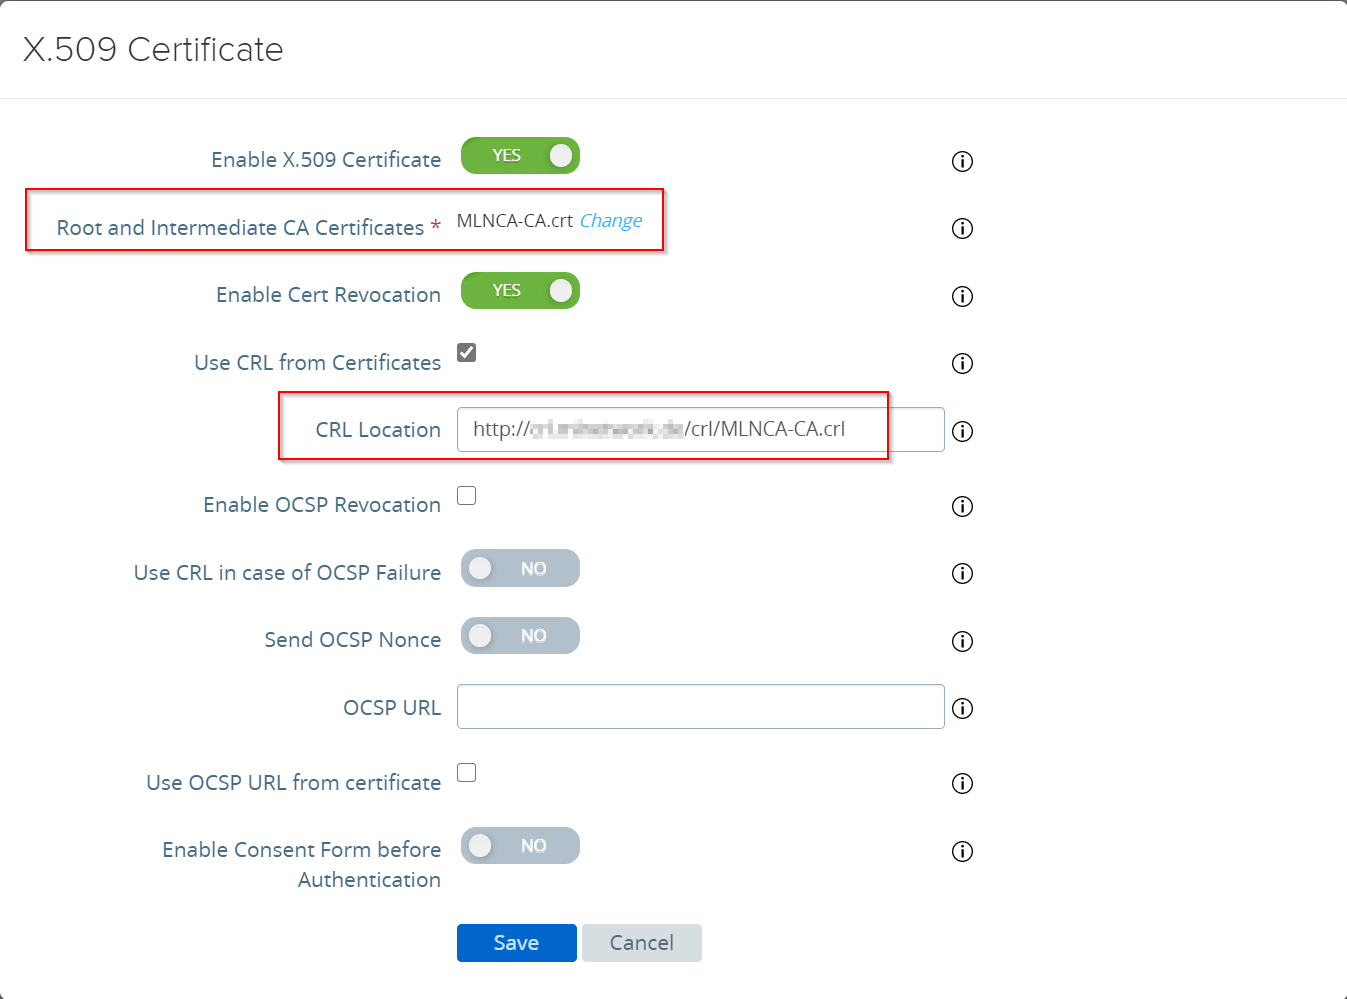
The first step is to configure the UAG to accept a device certificate. To do so, log into the UAG admin interface, expand the authentication settings and open the X.509 settings.
Patrick Terlisten/ vcloudnine.de/ Creative Commons CC0
You need to upload the Root CA certificate, which is used to sign the device certificates, as a Base64 coded file. I always recommend to enable “Cert Revocation”. You can enable “Use CRL from Certificates”, if the certificates include the URL to the CRL. Otherwise you can add the CRL location. This location must be accessable for the UAG! Click “Save” and you are ready to configure the Horizon settings.
Configure Horizon settings to use X.509 authentication
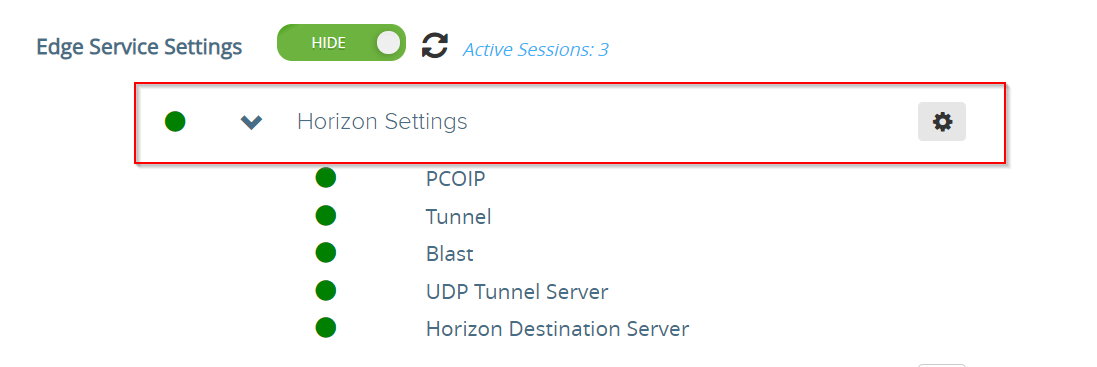
After you have configured the X.509 authentication, you have to enable the device certificate authentication for Horizon View. Expand “Horizon Settings” and enter the configuration settings.
Patrick Terlisten/ vcloudnine.de/ Creative Commons CC0
It is important to select “Device X.509 Certificate AND Passthrough”.
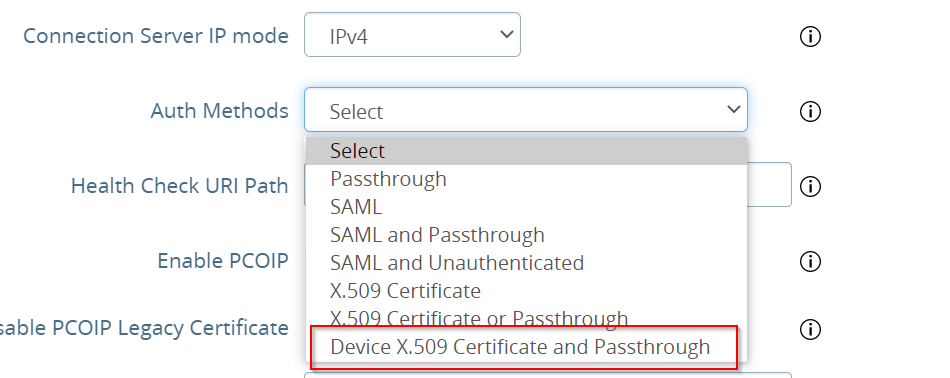
Patrick Terlisten/ vcloudnine.de/ Creative Commons CC0
Save the settings and you are ready to go. At this point a user must use a device with a valid device certificate.
Device Certificate
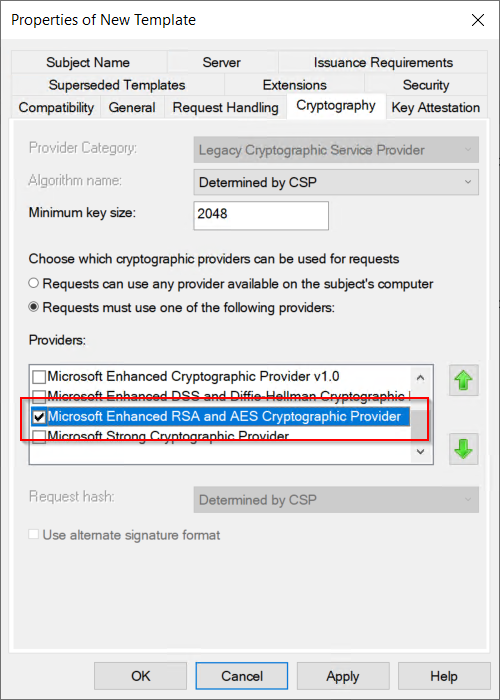
It is important to know that you have to create a new certificate template. The computer certificate template, which is included in a standard Microsoft PKI, cannot be used! It is mandatory to use the “Microsoft Enhanced RSA and AES Cryptographic Provider” in the template. It only works with this Cryptographic Service Provider (CSP)!
The easiest way is to duplicate the “Computer” template and change the necessary settings. First of all: The CSP must changed to “Microsoft Enhanced RSA and AES Cryptographic Provider” and it must be the only provider.
Patrick Terlisten/ vcloudnine.de/ Creative Commons CC0
The subject name of the certificate should automatically be populated with information from the Active Directory, in this case the computer name.
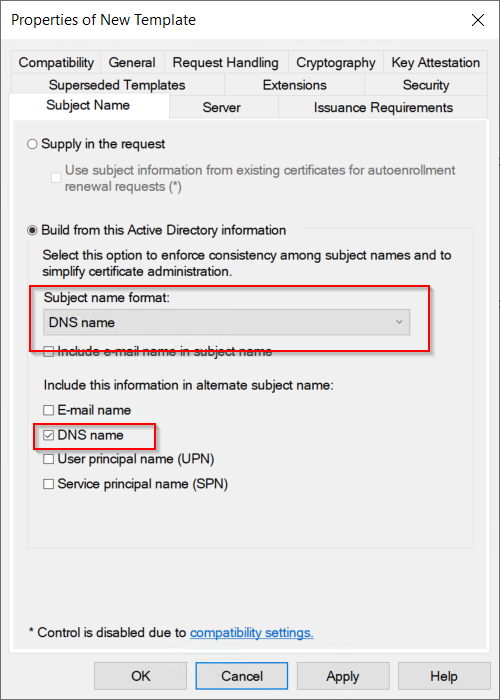
Patrick Terlisten/ vcloudnine.de/ Creative Commons CC0
Because the certificate is only for authentication purposes, you should remove “Server Authentication” from the Application Polices. Otherwise this certificate could be used to run a webserver.
Depending on your policies, you should mark the private key as “not exportable”!
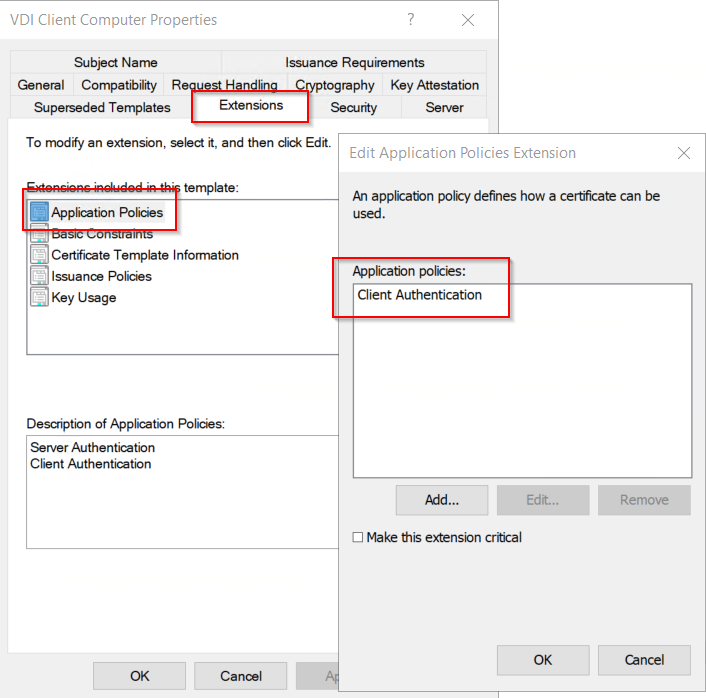
Patrick Terlisten/ vcloudnine.de/ Creative Commons CC0
The last step is important. After you enrolled the certificate to your computer, you need to add permissions to the user that should be able to use the certificate for authentication! This is necessary because it is a device certificate, and only SYSTEM and the local administrators group has permissions to access the private key of the certificate.
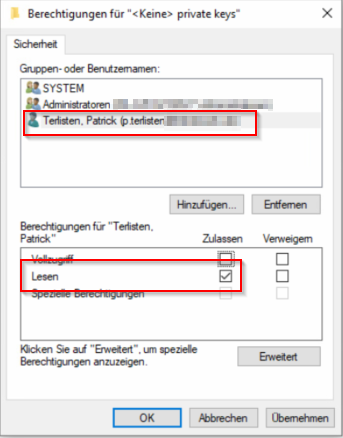
Patrick Terlisten/ vcloudnine.de/ Creative Commons CC0
That’s it. If you open the View Client and try to connect to your View environment, then you should get a certificate selection dialog. After chosing the correct certificate, you need to enter user credentials.
Only with a valid certificate and valid credentials a connection to your View environment is possible.
