Deploying HP StoreOnce VSA with HP Data Protector - Part II
In part I of this series I showed you the download and the deployment of the HP StoreOnce VSA. But without further configuration, it’s only a VM that has 4 vCPUs, 16 GB memory and ~ 1,5 TB of disk space. Pretty much for a VM that can’t do anything for you. ;)
Creating a library
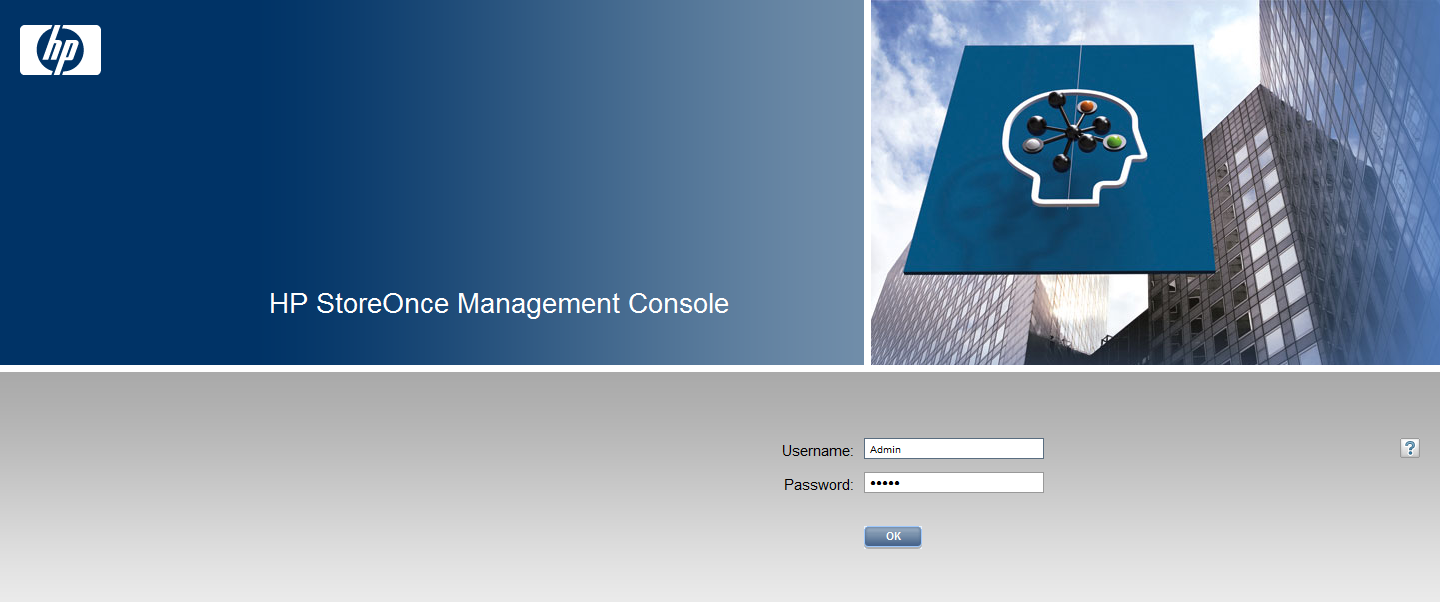
Open a browser and open the StoreOnce Management Console.
Username: Admin Password: admin

Patrick Terlisten/ vcloudnine.de/ Creative Commons CC0
First of all I recommend to disable the “Auto Create” option. If you leave this option enabled, a VTL will automatically created when an iSCSI initiator connects to the StoreOnce VSA. Click on “VTL” in the navigator pane, click “Edit”, uncheck the box and click “Update”.

Patrick Terlisten/ vcloudnine.de/ Creative Commons CC0
Click on “Libraries” and then click “Create” on the upper right.

Patrick Terlisten/ vcloudnine.de/ Creative Commons CC0
Enter a name for the new library. You can choose between different emulation types. I selected a MSL2024 with two LTO-5 drives. The iSCSI initiator name is the IQN of my Data Protector backup server. Enter the IQN of the server, which should connect to the VTL. Some words to the “right” design: I recommend to create a library for each type of data, e.g. a library for Exchange, one for fileservices, one for SQL etc. This ensures better dedup results.

Patrick Terlisten/ vcloudnine.de/ Creative Commons CC0
I also created a second library for Exchange backups.

Patrick Terlisten/ vcloudnine.de/ Creative Commons CC0
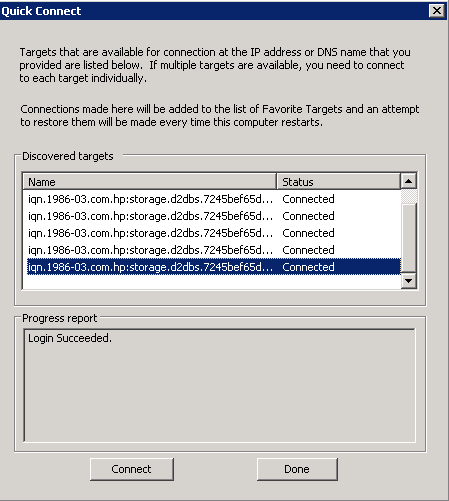
Now it’s time to connect the libraries to our backup server. I used the iSCSI initiator from Microsoft, which is included in Windows Server 2008 R2. Enter the ip address of the StoreOnce VSA and click “Quick Connect…”

Patrick Terlisten/ vcloudnine.de/ Creative Commons CC0
Select each entry and lick “Connect”.

Patrick Terlisten/ vcloudnine.de/ Creative Commons CC0
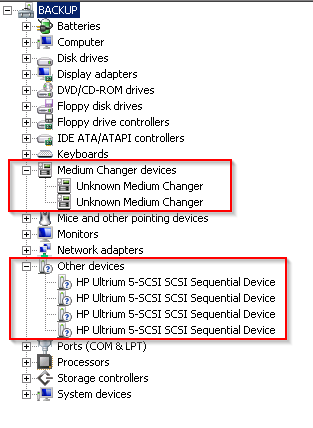
No you should see the devices in the Windows Device Manager. If you have two libraries with two drives, you should see six entries: Two media changer and four drives.

Patrick Terlisten/ vcloudnine.de/ Creative Commons CC0
At this point is the configuration of the StoreOnce VSA finished. The next part covers the configuration of the libraries and media pools in HP Data Protector 8.1.
Feel free to leave a comment if you have further questions or notes.
