vSphere Lab Storage: Synology DS414slim Part 2 - Networking
The next step is to connect the Synology DS414slim to my lab network. I use two HP 1910 Switches in my lab, a 8 Port and a 24 Port model. The Synology DS414slim has two 1 GbE ports, which can configured in different ways. I wanted to use both ports actively, to I decided to create a bond.
Create a bond
Browse to the admin website and go to Control Panel > Network > Network Interfaces and select “Create”. Then select “Create Bond”.

Patrick Terlisten/ vcloudnine.de/ Creative Commons CC0
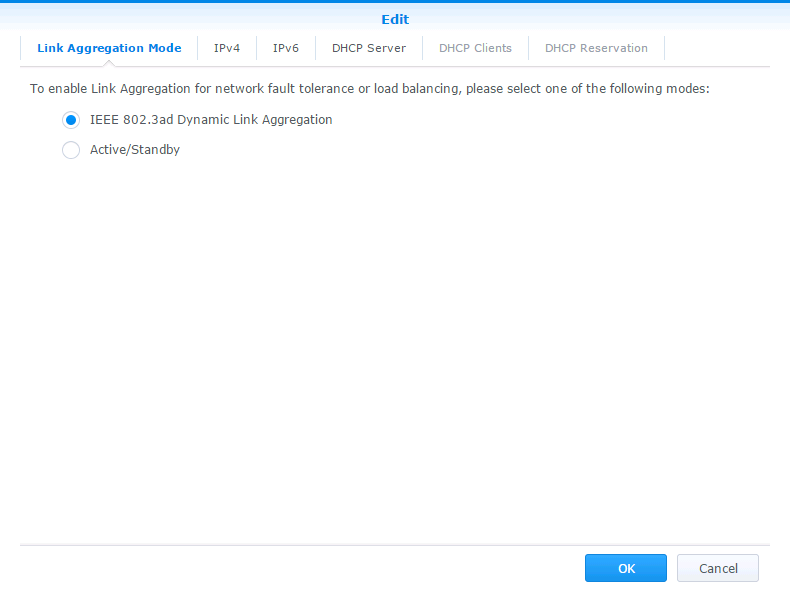
To utilize both NICs, select the first option: “IEEE 802.3ad Dynamic Link Aggregation”. This option requires switches that are capable to create a LACP LAG! I will show the configuration of a LACP LAG on one of my HP 1910 switches later.
Patrick Terlisten/ vcloudnine.de/ Creative Commons CC0
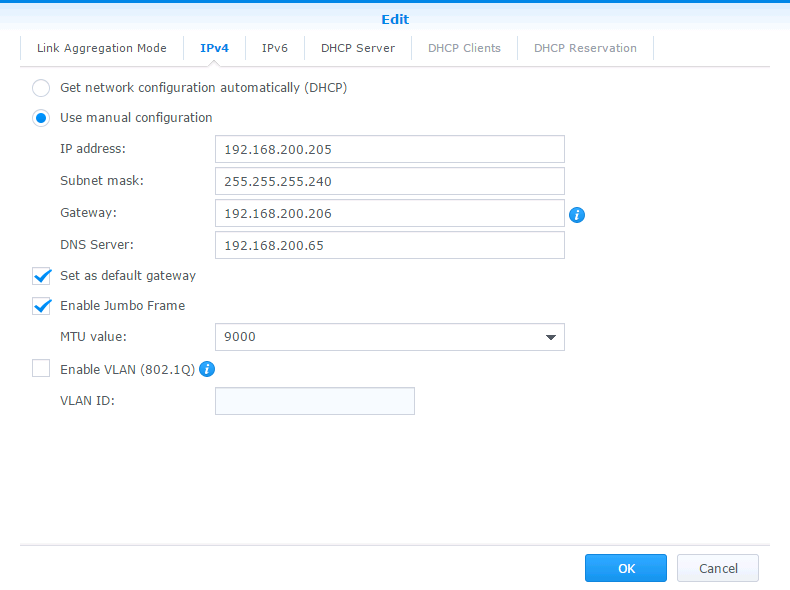
Click “IPv4”. I have a dedicated VLAN and subnet for NFS. This subnet is routed in my lab, so I that the can reach the DS414slim for management. Make sure that you enable Jumbo Frames and that every component in the network path can handle Jumbo Frames! Switch to the “IPv6” tab.
Patrick Terlisten/ vcloudnine.de/ Creative Commons CC0
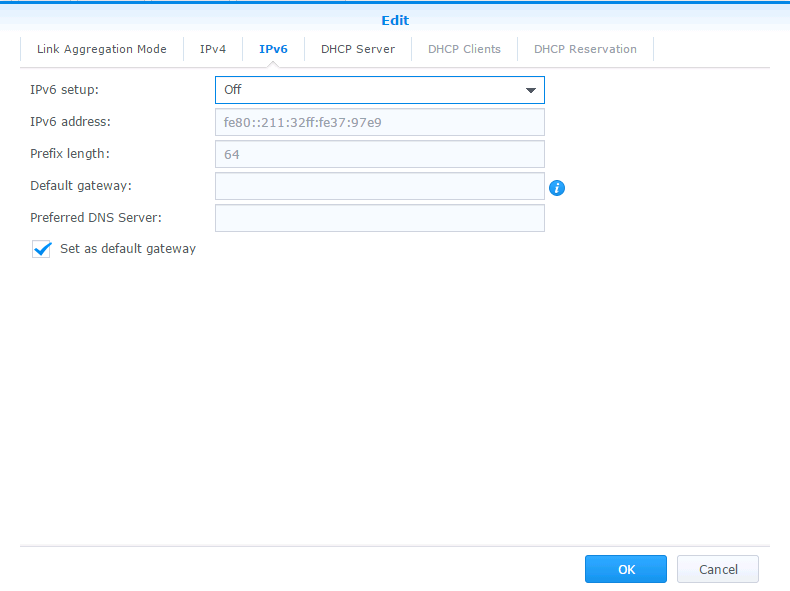
I don’t want to use IPv6, so I decided to disable it.
Patrick Terlisten/ vcloudnine.de/ Creative Commons CC0
Click “OK” and wait until the configuration is finished.
Create a LAG
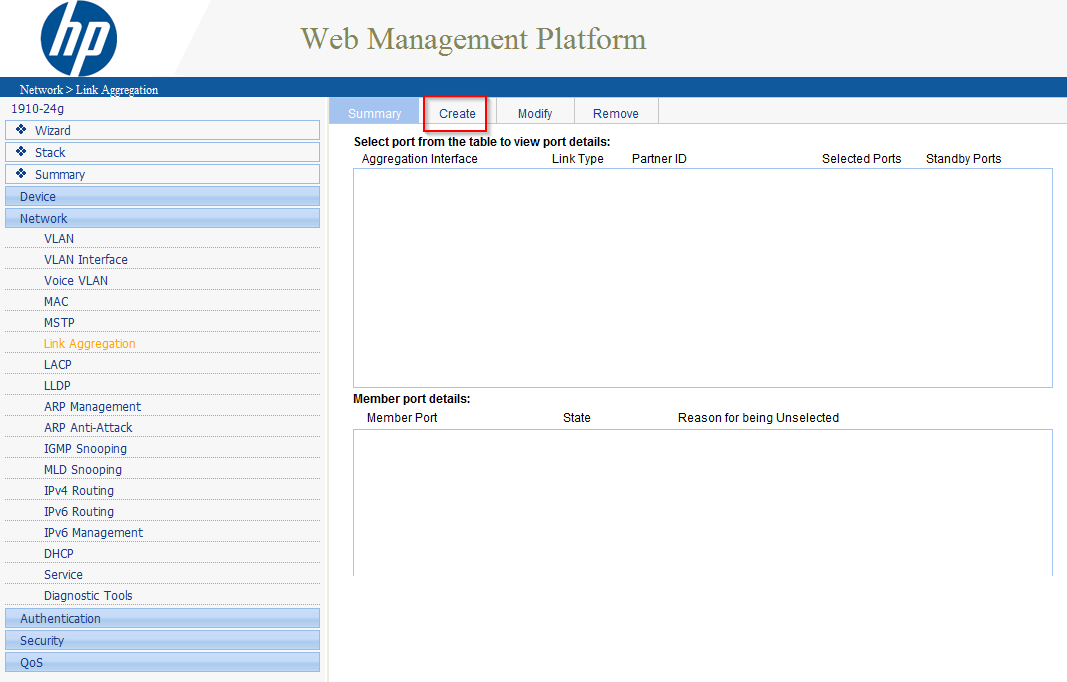
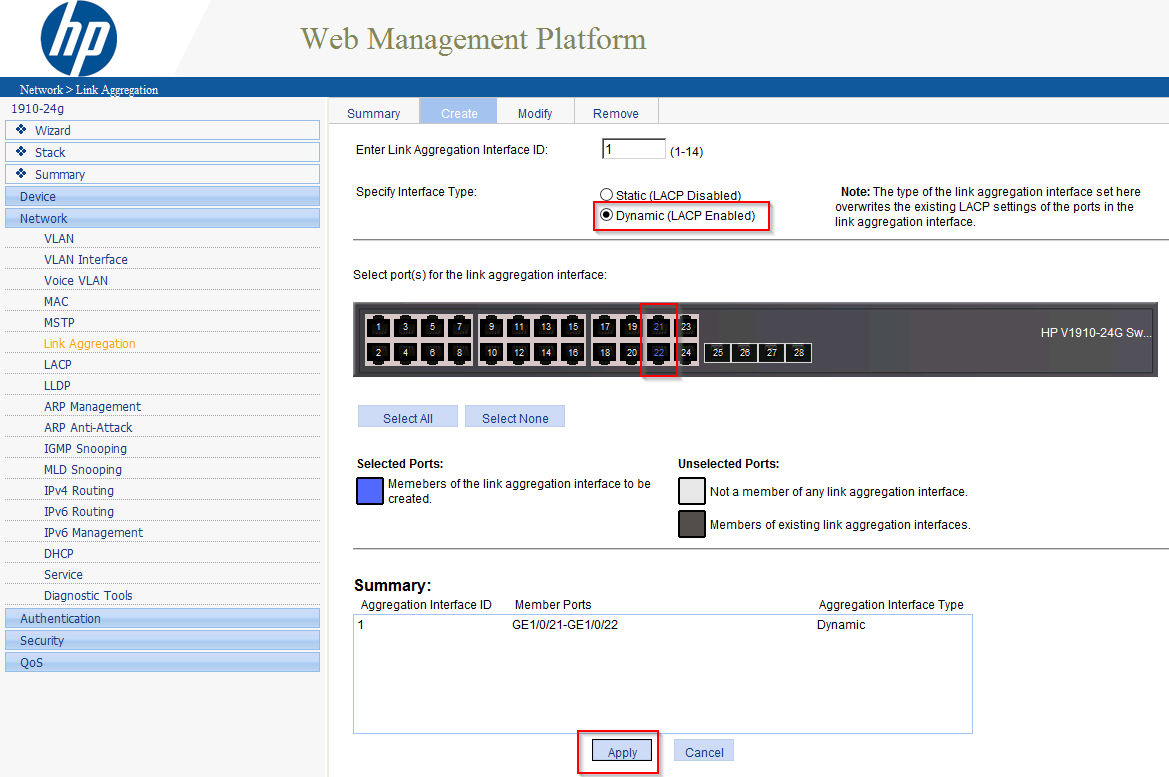
Now it’s time to create the LAG on the switch. As I already mentioned, I use two HP 1910 switches in my lab. Both are great home lab switches! They are cheap and they can do L3 routing. Browse to the web management, log in and select Network > Link Aggregation and click “Create”.
Patrick Terlisten/ vcloudnine.de/ Creative Commons CC0
Enter a interface ID for the LAG. In my case there were no LAGs before, so the ID is 1. Select “Dynamic (LACP Enabled)” and select two ports on the figure of the switch. Check the settings in the “Summary” section and click on “Apply”.
Patrick Terlisten/ vcloudnine.de/ Creative Commons CC0
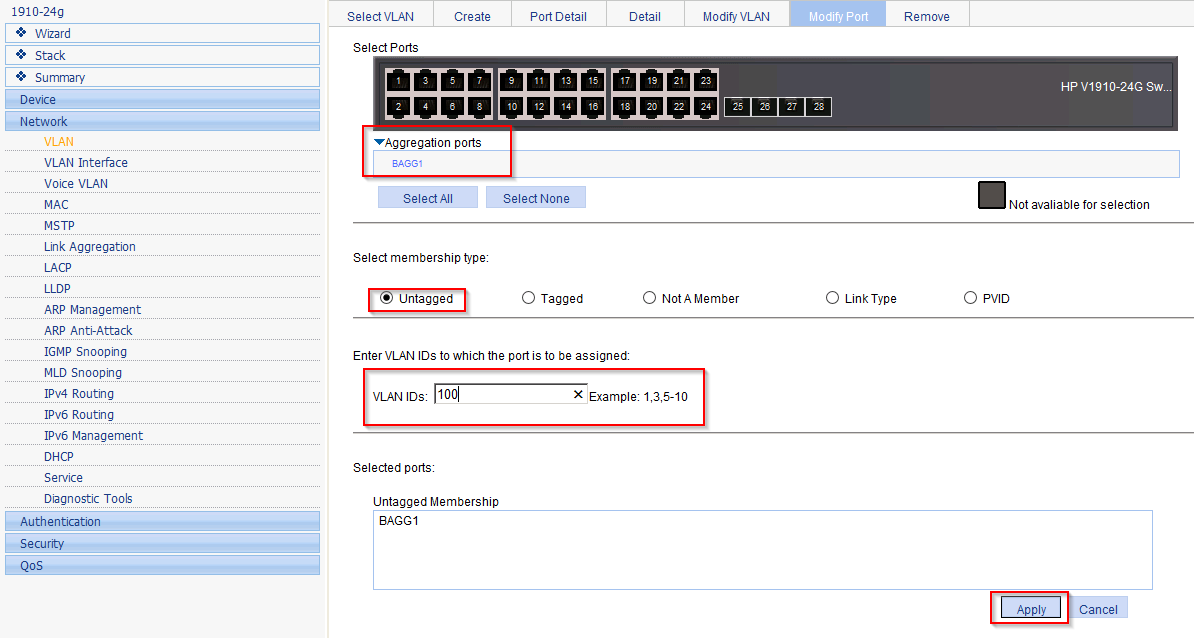
Now we need to place the LAG in the correct VLAN. Select Network > VLAN and select “Modify Ports”. Select “BAGG1” from “Aggregation ports” and place the LAG as an untagged member in the NFS VLAN (in my case this is VLAN 100). Finish this task by clicking “Apply”.
Patrick Terlisten/ vcloudnine.de/ Creative Commons CC0
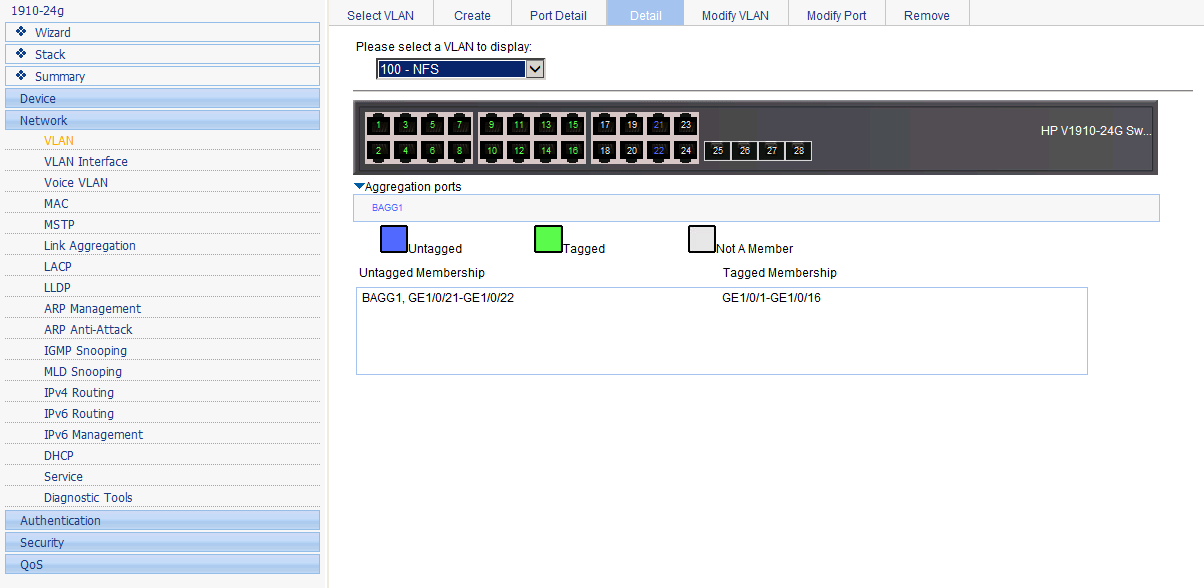
You can check the success of this operation by switching to the “Details” pageand then select the NFS VLAN.
Patrick Terlisten/ vcloudnine.de/ Creative Commons CC0
Connect the DS414slim with the two patch cables to the ports that were now configured as a LAG. If everything is configured correctly, the DS414slim should be reachable, with its new IP and in the NFS VLAN.
VMkernel configuration
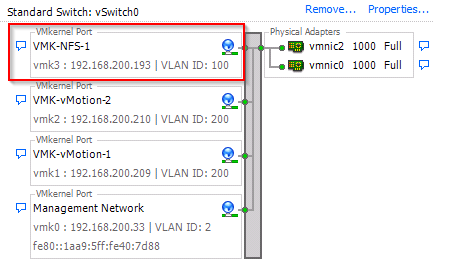
Make sure that you have at least one VMkernel port configured, that is in the same subnet and VLAN as you DS414slim. You can see that the VMkernel port is placed in VLAN 100 and that is has a IP from my NFS subnet.
Patrick Terlisten/ vcloudnine.de/ Creative Commons CC0
You should also make sure, that the VMkernel port and the vSwitch can handle Jumbo Frames. The HP 1910 switch series has enabled Jumbo Frames by default.
Final words
The network setup depends on your needs. I strongly recommend to use a dedicated VLAN and IP subnet for NFS. I also recommend the use of Jumbo Frames. Make sure that all componentens in the network path can handle Jumbo Frames and that the VLAN membership is correctly set. If possible, use a bond on the Synology and a LAG on the switch.
Part 3 of this series covers the creation of NFS shares: vSphere Lab Storage: Synology DS414slim Part 3 - Storage
